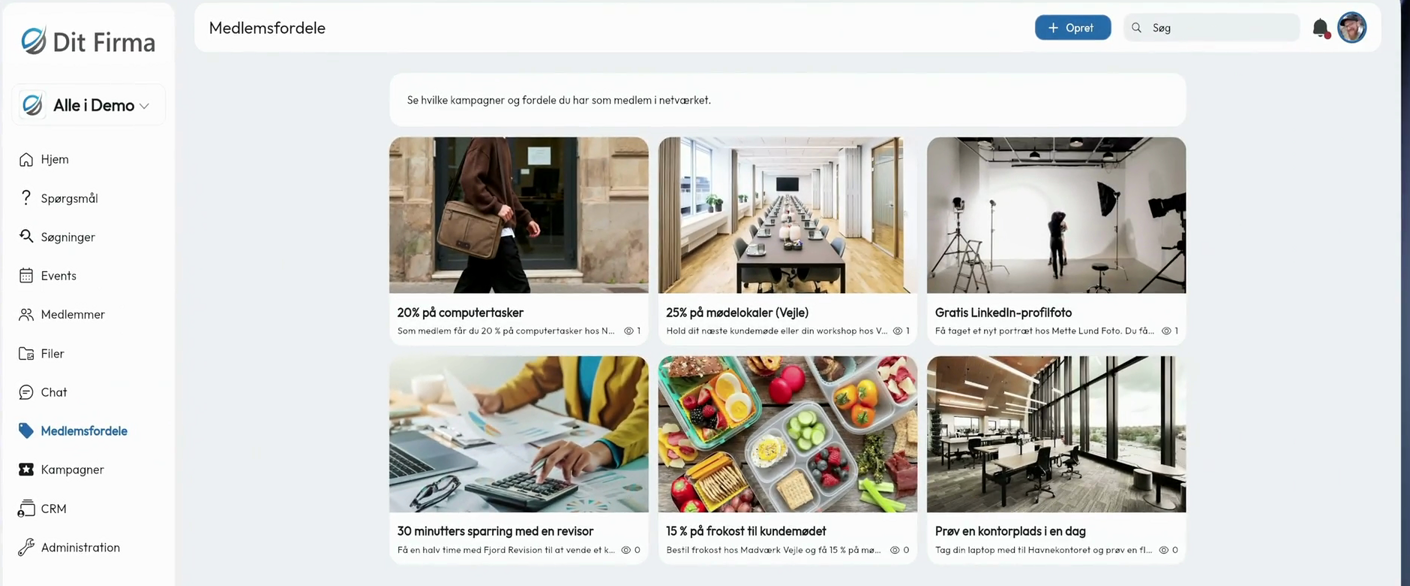
Where will members find their meeting room discount the next time they book a client meeting? A custom page gives benefits like this a home in your app’s menu. Each benefit gets its own card with a short description and room for an image, a link or a PDF.
The video shows a finished Member Benefits page and how to set up a new Campaigns page. The video and screenshots use the Danish interface. The steps below include the Danish labels so you can follow along.
1. Add a custom page
Go to Administration → Organisation → Adgang og moduler (Access and modules). Scroll to Brugersider (Custom pages) and click Tilføj (Add).
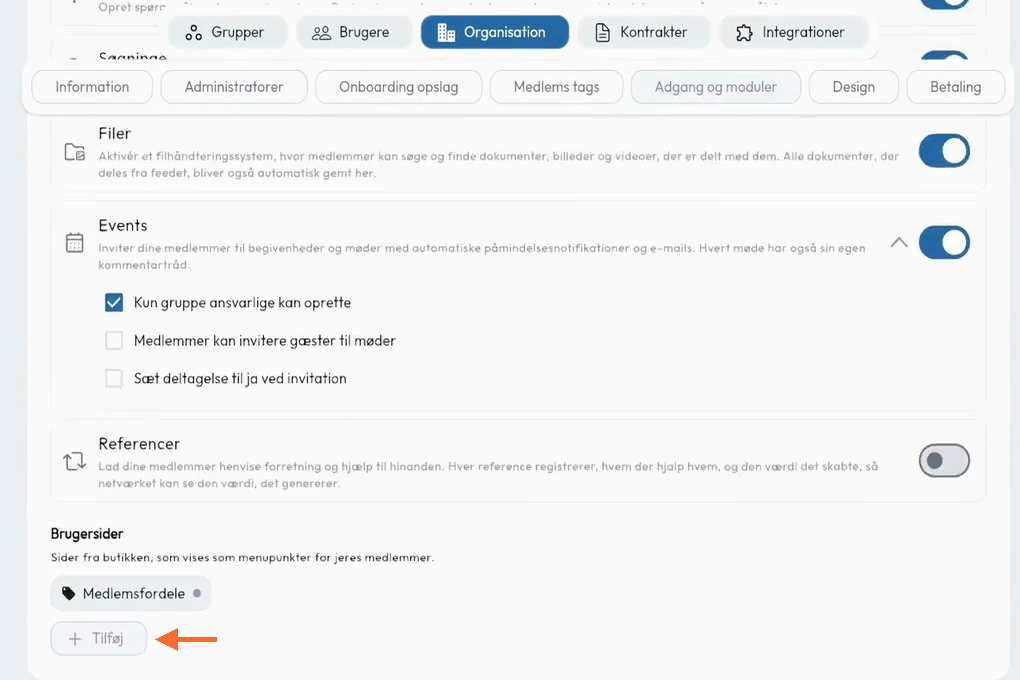
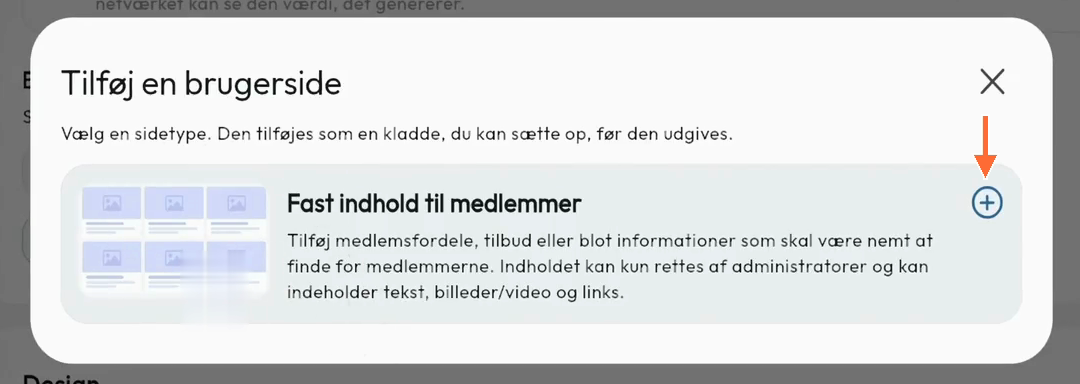
Choose Fast indhold til medlemmer (Static content for members). Samli creates a draft so you can set up the page before it appears in the members’ menu.
2. Name the page and set its menu position
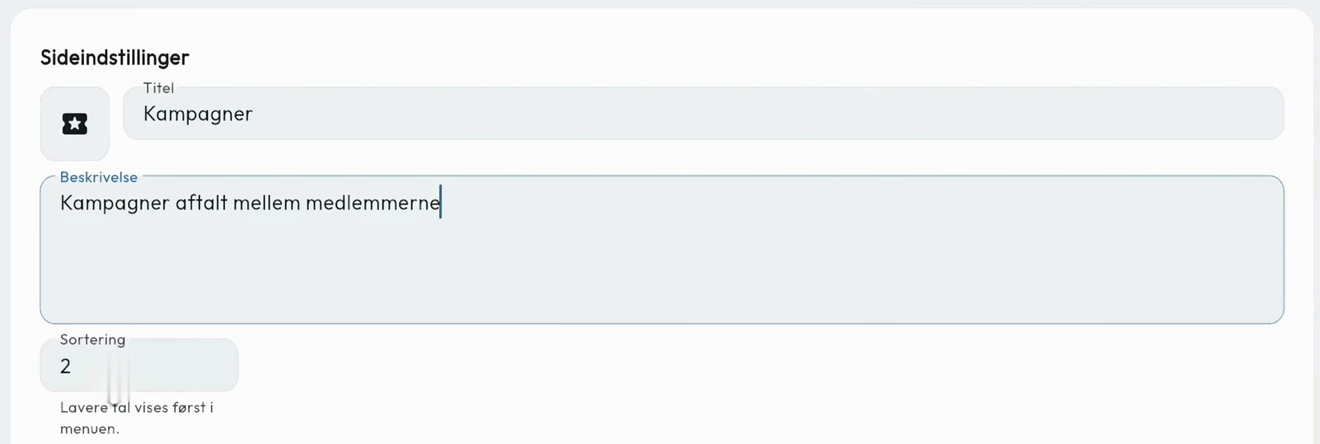
Under Sideindstillinger (Page settings), enter a Titel (Title), such as Campaigns. This becomes the menu label. Choose an icon and write a short Beskrivelse (Description) that members will see at the top of the page.
Use Sortering (Sort order) to position the page among your custom pages. Lower numbers appear first. Leave Udgivet (Published) off and click Gem (Save) while you prepare the page.
3. Choose who can see the page
Under Hvem kan se den (Who can see it), choose Alle medlemmer (All members), Kun administratorer (Admins only) or Udvalgte grupper (Selected groups). If you choose selected groups, you can add one or more. In the video, both Nord and Syd get access to Campaigns.

4. Add a card for each benefit or campaign
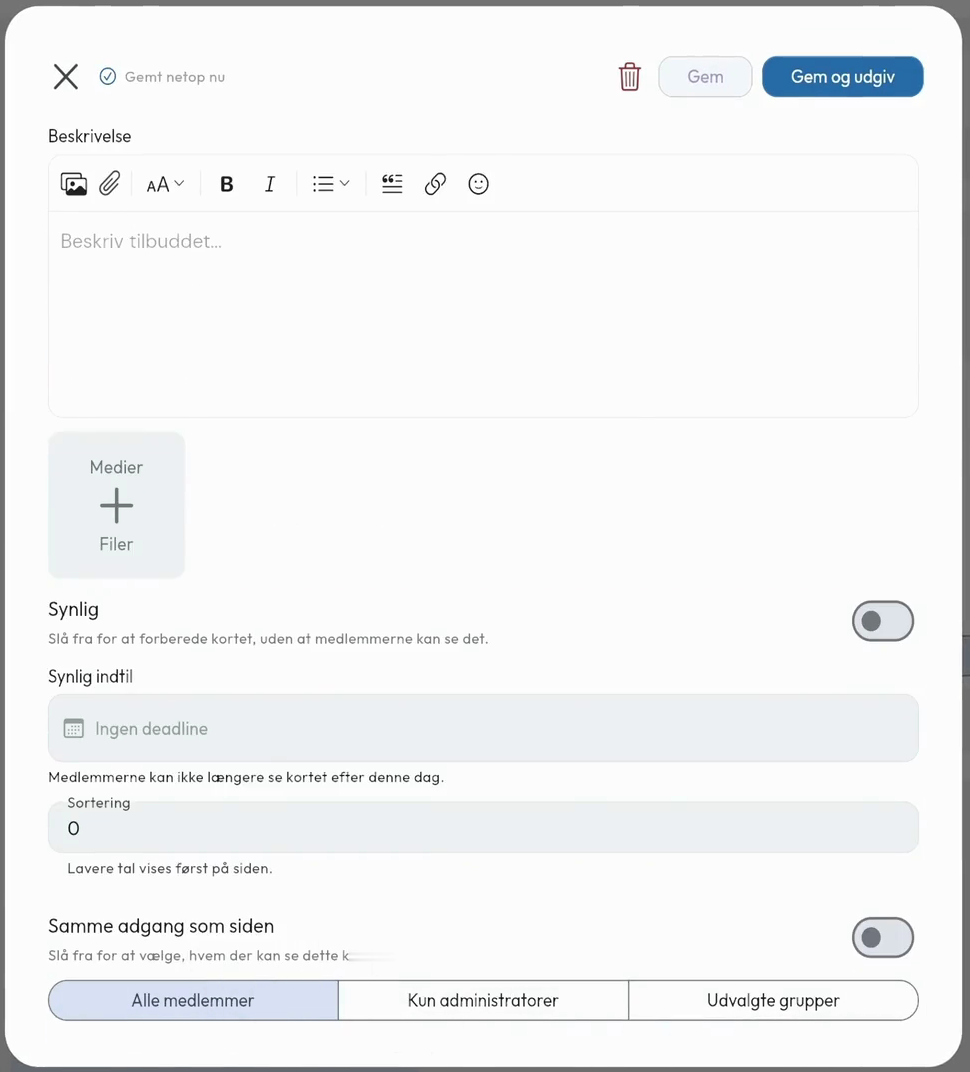
Under Kort (Cards), click Tilføj kort (Add card), give the card a title and click Fortsæt (Continue). Describe the offer and how members can use it. Add an image, a link or a PDF, such as a form they need to fill in.
- Use Synlig indtil (Visible until) if the card should disappear after a specific date.
- Use Sortering (Sort order) to move the card up or down the page. Lower numbers appear first.
- Leave Samme adgang som siden (Same access as the page) on to use the page’s audience. Turn it off if, for example, only Nord should see a particular offer on a page that both Nord and Syd can access.
Click Gem og udgiv (Save and publish) when the card is ready. You can also save it with Synlig (Visible) turned off while you work on it.
5. Publish the page and find it in the menu
Go back to Sideindstillinger (Page settings), turn on Udgivet (Published) and click Gem (Save). Members can see the cards once the page itself is also published.

Refresh Samli if the menu item doesn’t appear straight away. On a computer, members with access will find the page in the left-hand menu. In the mobile app, they tap their profile picture and choose the page from the profile menu.
If you have other content you’d like to make easy to find in your app, contact Samli Support and we’ll help you work out how to display it.